How to Fix Drywall Patch Marks Showing Through Paint?
Fix the blemishes easily and professionally with just a few moves
Since drywall is a very popular and widespread material in many homes and buildings, people often tend to have issues with fixing it. The reason is quite simple: drywall is very susceptible to dings, dents, and scratches of all kinds. Even peeling tape that covers the joints can leave visible marks on its surface!
This is why, when we end up with more serious flaws, such as patches, we only have one question. How to paint over drywall repairs so that they are hidden and not seen anymore? As long as this is the most frequent request, we decided to provide you with a detailed instruction on repairing drywall patches showing through paint.
Fixing Drywall Patch Marks That Show Up Through Paint
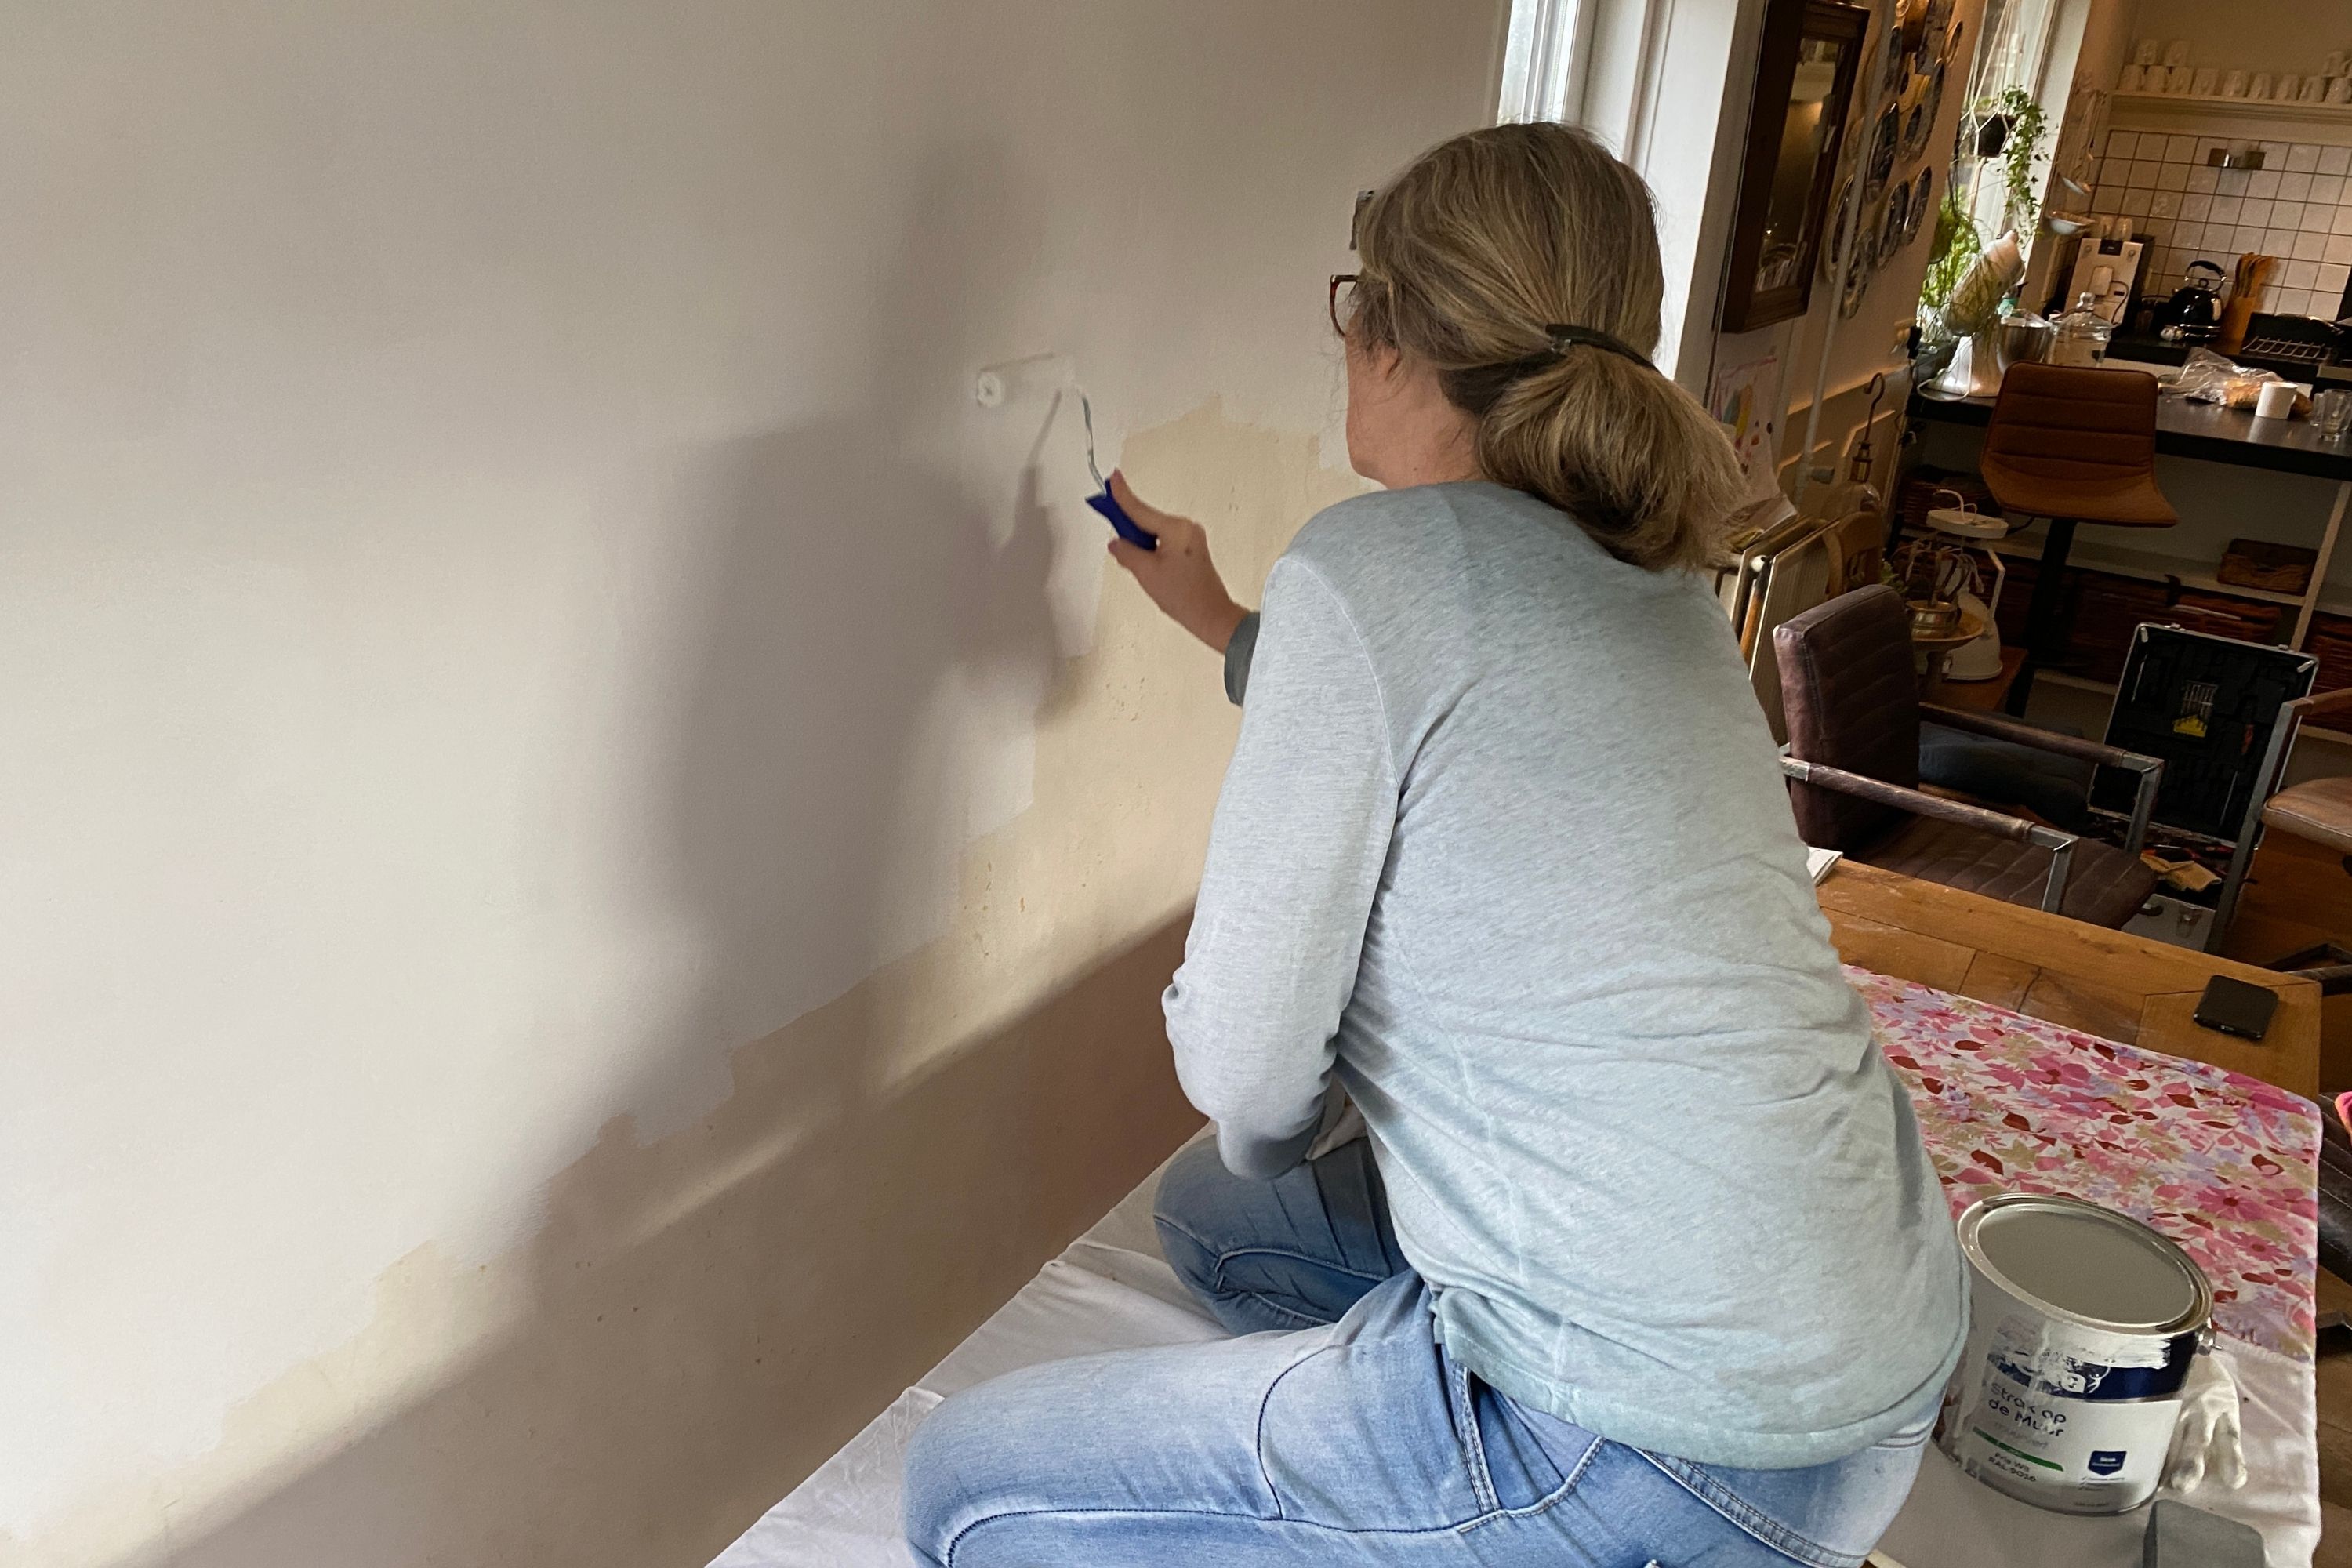
If it so happens that you can see smooth and flat spots of drywall patches through the layer of paint, there is one universal way how those can be fixed. In a few words, first you need to rework the patch areas with drywall topping compound (also known as wall patching compound). Afterward, delicately and carefully sand the patch until its level is the same as the rest of the wall. Finally, prime the wall using a roller. Finish your repair project with painting the entire wall with two coats of paint.
Sounds similar, we know, and most of you probably feel so enthusiastic that you are ready to grab the tools and set off to start fixing the drywall. However, we strongly recommend you keep on reading carefully since we are going to describe the drywall patches repair procedure to you in detail. When you know the step by step guide properly, there are very few chances that you do something wrong and screw the whole work completely.
So, here is how to fix bad drywall that has patch marks on it and do it professionally. You will need to complete a few simple steps.
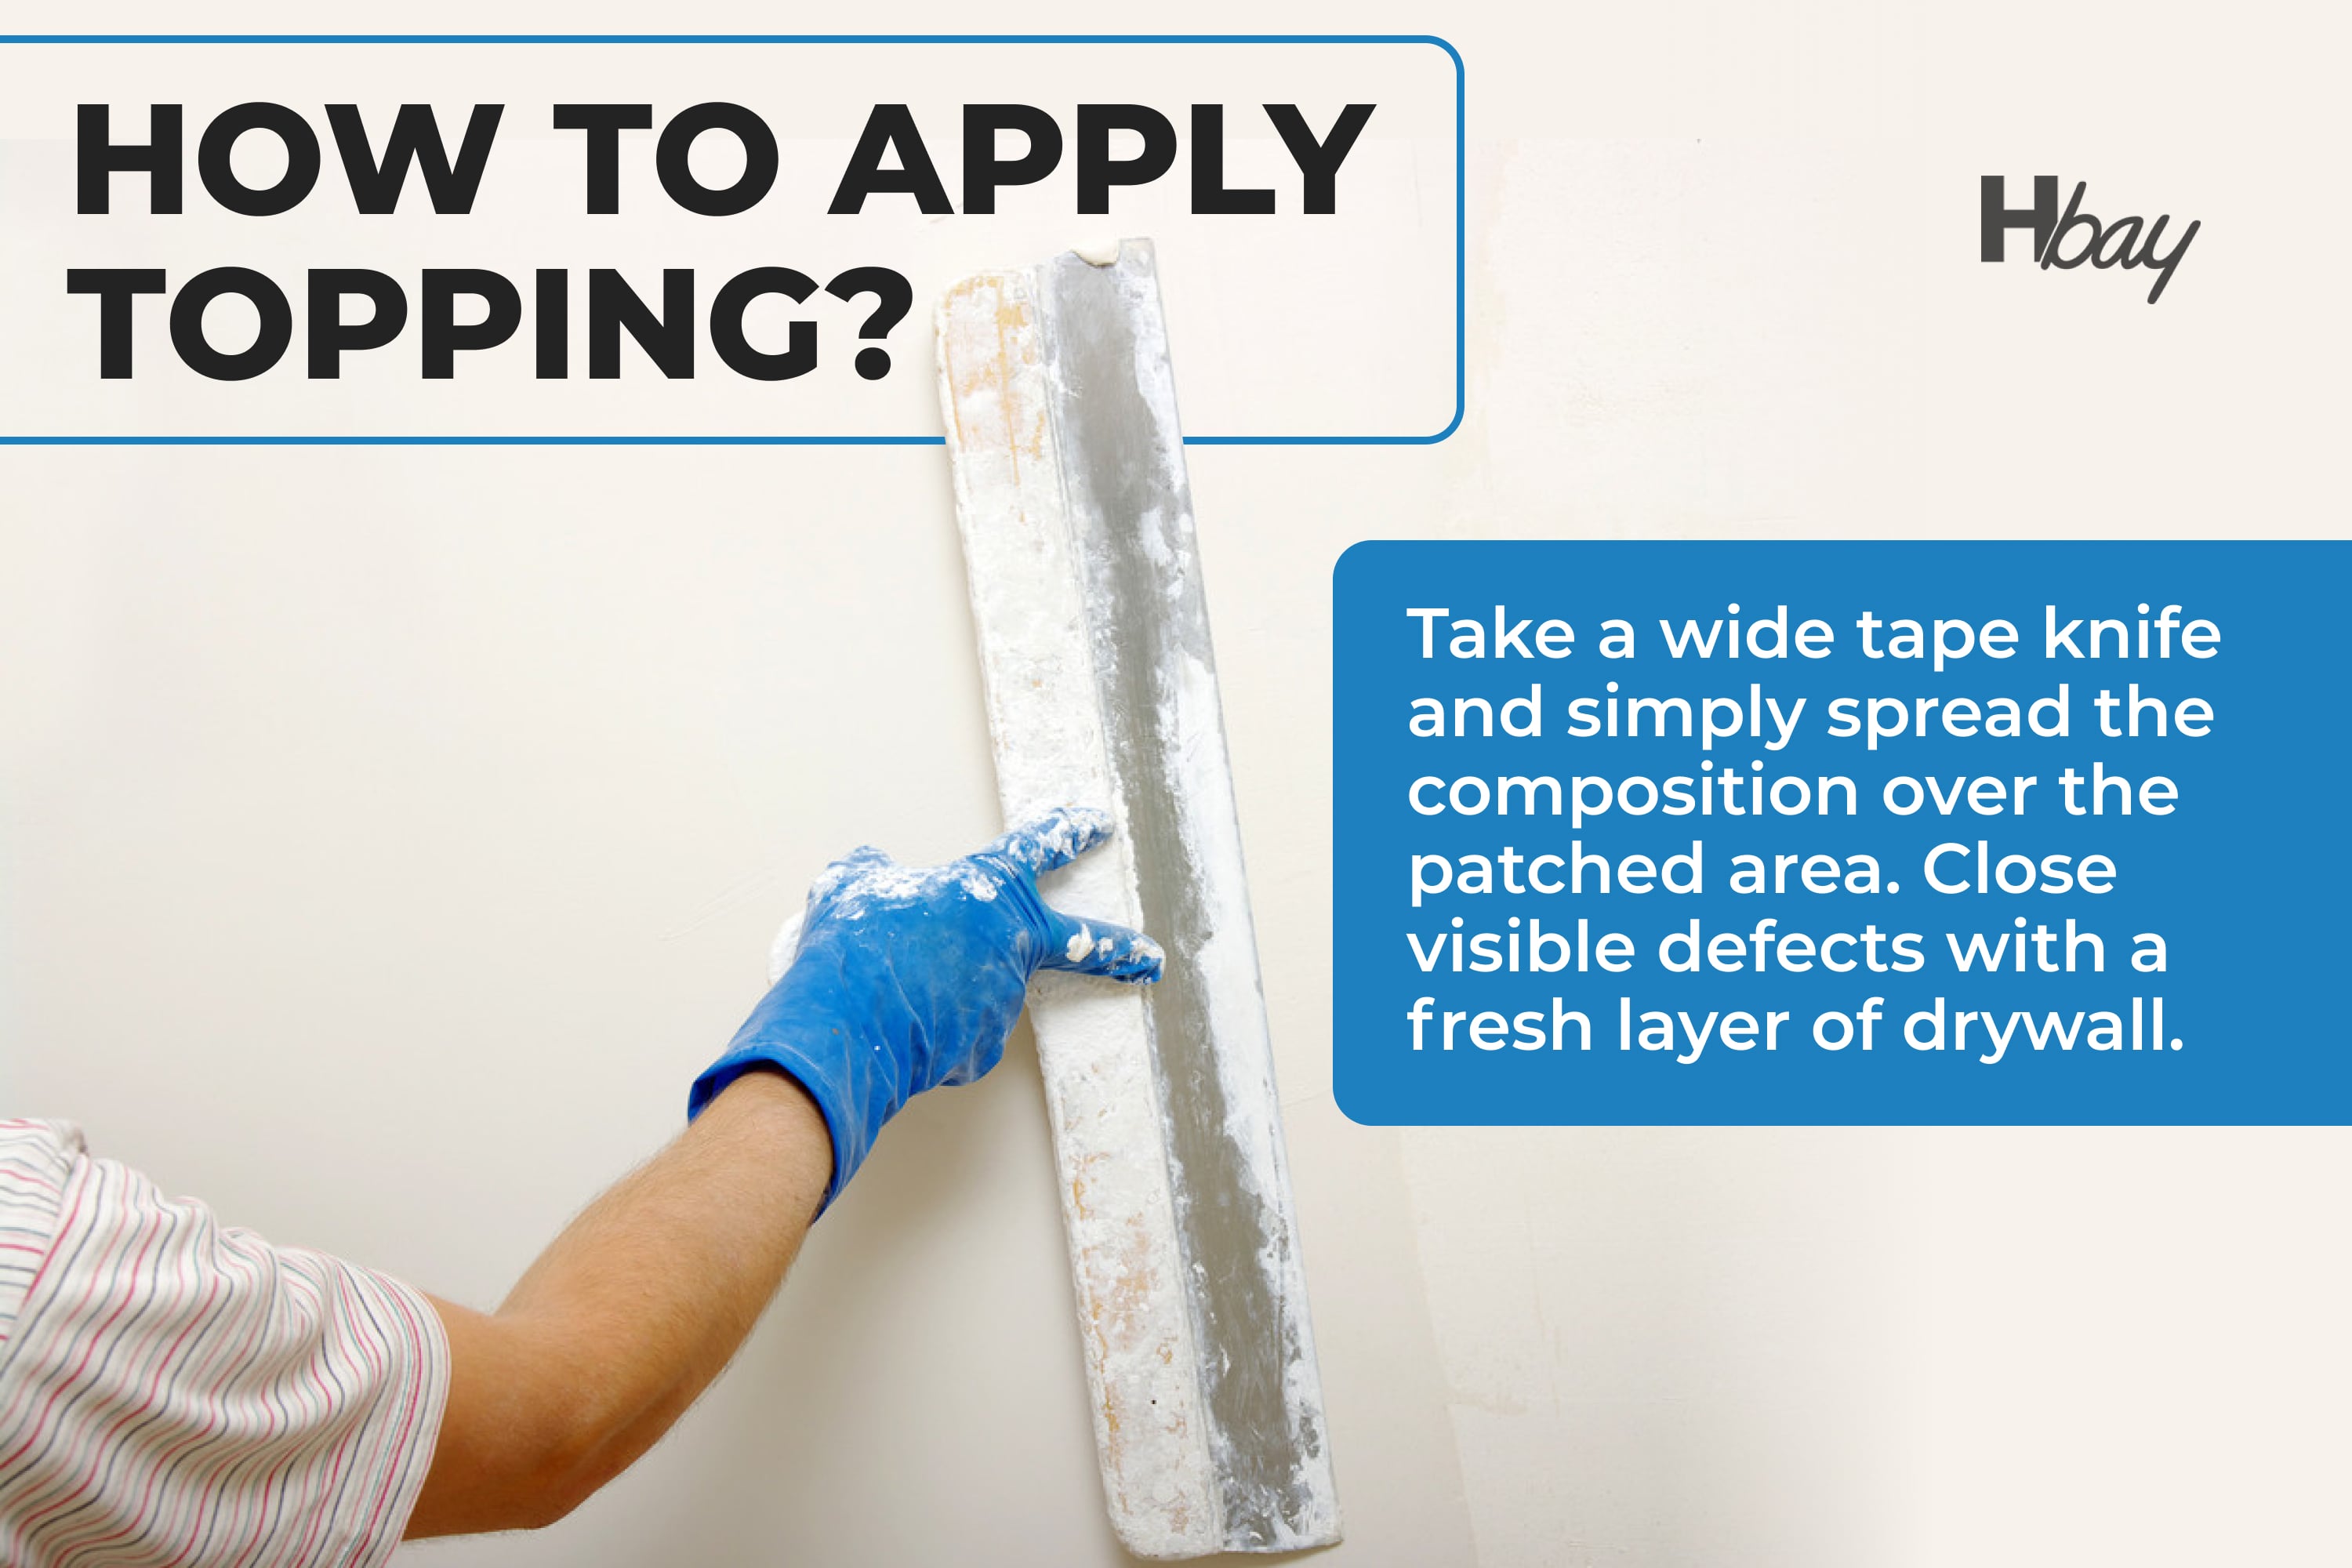
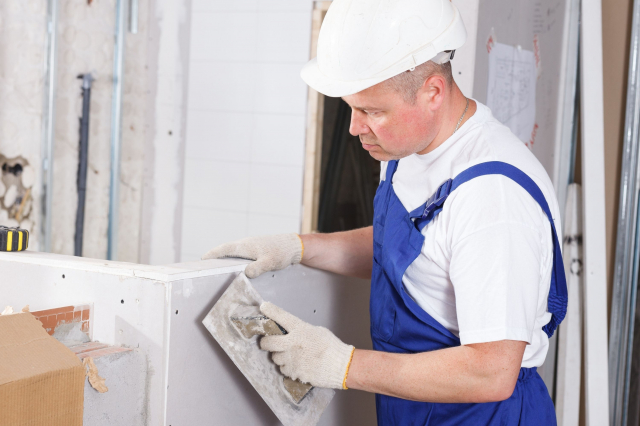
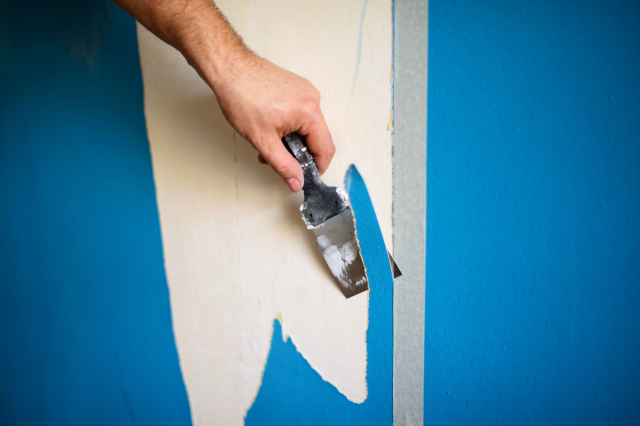
Apply Topping Compound
The very first step you should start with when you need to do some local drywall repair is to apply a coat of topping compound. The goal is to resurface the wall that has patches on it. But also, it is important to make use of a material that can be easily sanded and painted later.
housekeepingbay.com
This is why topping compound is the optimal solution in this case. To apply it evenly and smoothly, take a wide taping knife and simply spread the compound over the patched area. Cover the visible flaws with a fresh layer of drywall compound.
Then make use of a specialized topping compound to apply a new layer of joint material on patches that can be seen through paint.
Spread the topping compound so that you could fill all the imperfections, and feather the substance out at least two and a half centimeters around the patched area in all directions.
Remember that it is essential to cover a bit more than just the patched area! To achieve this, spread the joint compound beyond the visible patch. Taper it smoothly so that the substance blends with the surrounding wall.
Credits: welcomia, via Camva.com
Table of Contents
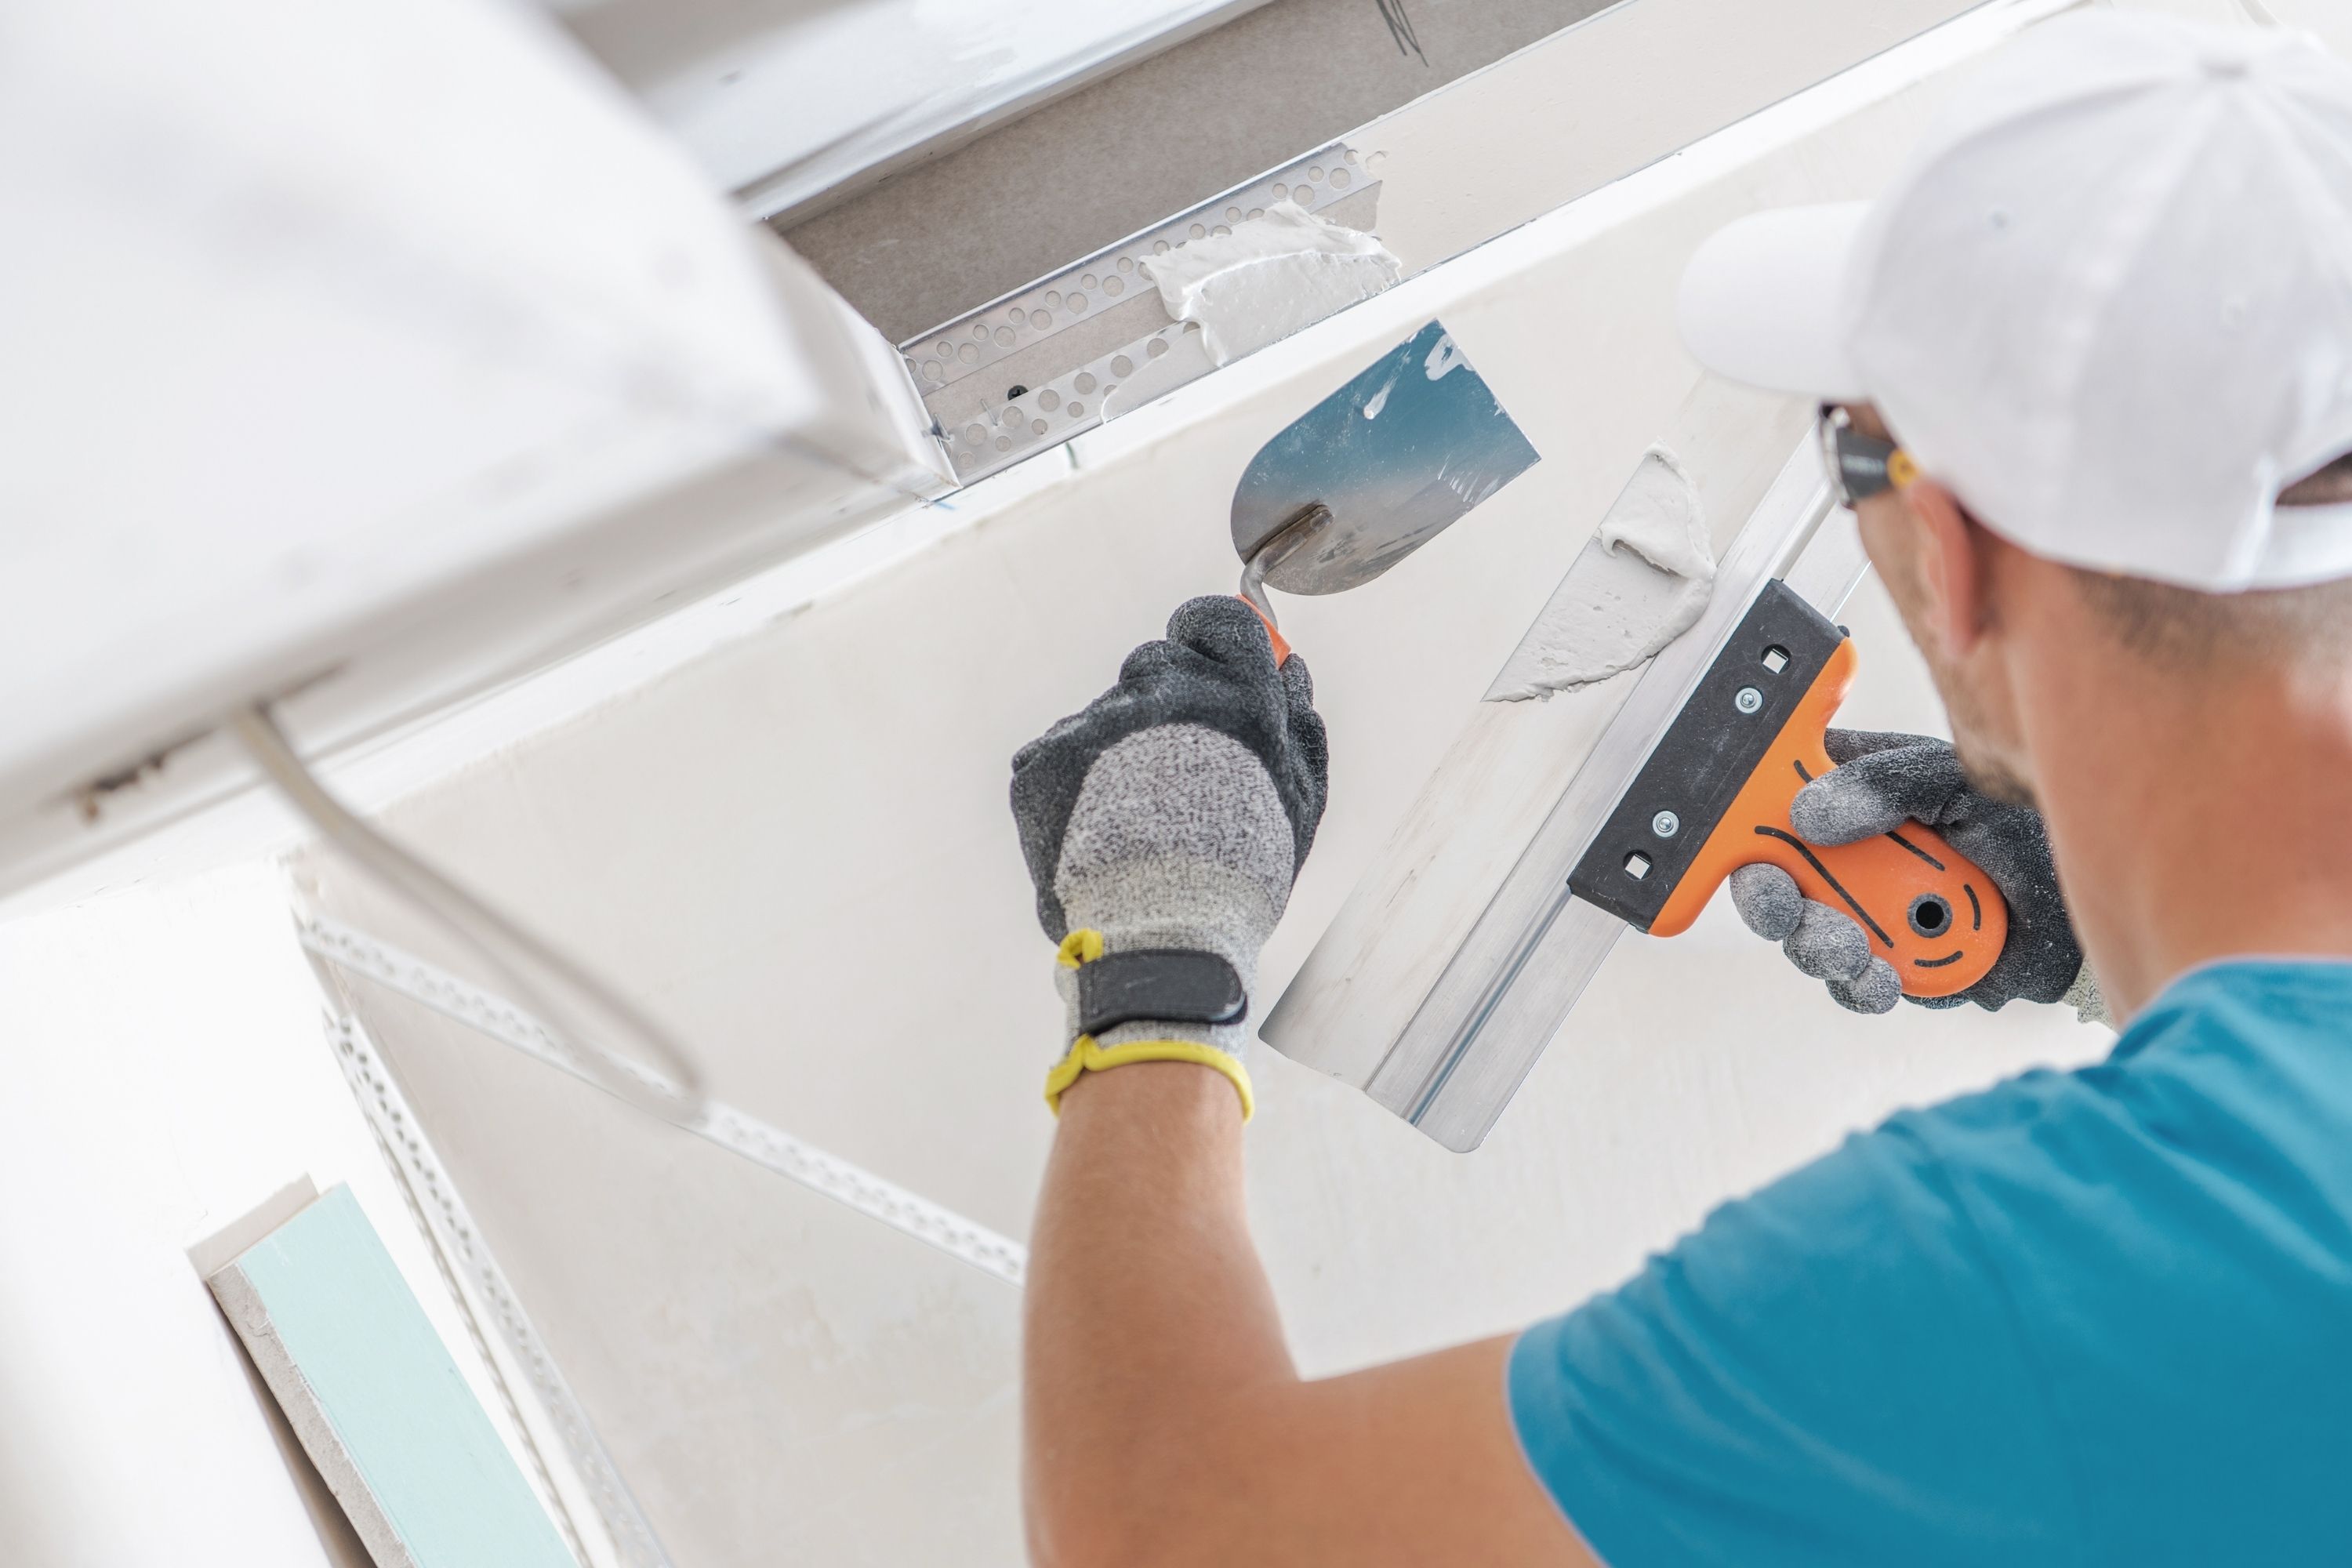
Proceed With Sanding
The next step is to sand the topping compound you have just applied. Since you have already resurfaced the damaged areas, it is time to sand them carefully to make the surface of the wall even.
We would recommend you start with 150 grit sandpaper. Why is that? Well, it will allow you to smooth out the compound, and also, to get rid of any ridges that are left by the taping knife.
Afterward, when this preparing stage is done, proceed with 220 grit sandpaper instead. It will create a smooth finish and also it will help to blend the feather-like edges with the rest of your wall.
After you are done, check the wall for any imperfections. All the patches must be flush with the rest of the wall. If they are not, feel free to sand the problematic areas a bit more.
There is one more tip you can make use of to ensure that the wall is ideally even. Simply feel it to the touch! Your fingers will tell you whether the surface is even and smooth as it should be, or whether there are still any patches that are raised above the rest of the wall.
If you still can feel any flaws, don’t hesitate to sand the wall more. Remember, in the end, you must have those patches flush with the wall completely. Otherwise, when they catch up to the light, they will stand out significantly!
Credits: welcomia, via Canva.com
Apply the Primer
This step must never be skipped! Primer is needed to make sure the patches have the same texture as the rest of the drywall.
How do you do this? Simply take a roller with ⅜” or ½” nap for the primer application. Why should we use this particular one? SImply because it is long enough to apply a bit of texture which will allow you conceal drywall patches!
Apply the primer onto the entire wall where the new patches have appeared. And if you want to achieve even better results, try to wait for twenty-four hours, and then apply another layer or primer.
And remember that, if afterward you can still see those patch marks as if nothing happened, go back to the steps one and two we have described above for you. Repeat them and then prime the wall again. If you do not do this, the patches will be seen through the paint layer just as they can be seen through the coat of the primer!
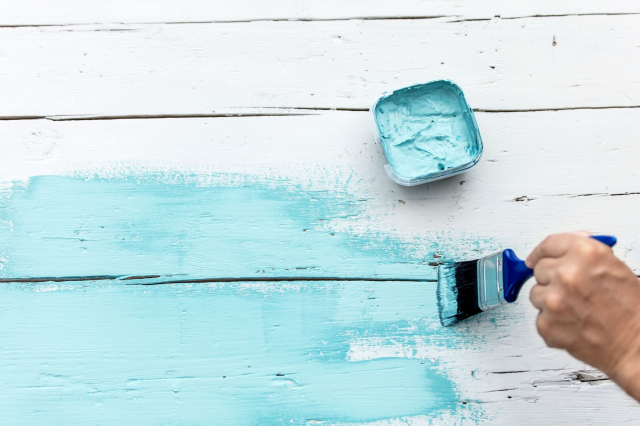
Paint the Wall
Since now your entire wall is patched, sanded, and primed, you can finally repaint it. We advise you to apply two coats of paint with the waiting time of twenty-four hours between each to let them dry.
It is important to give your paint enough time to dry since, if you apply the second coat too soon, the painted cover will most likely peel or bubble, being unable to adhere properly.
But do keep in mind that, to apply paint successfully, the entire wall must be previously re-primed and repainted. Like this, you will be totally sure that the color of the wall is uniform, and also, that the patches are covered and are not visible anymore.
With this detailed guide on how to fix drywall that has patch marks showing through paint, you will not have to worry anymore when you need to make those ugly patch marks disappear.

Credits: Murat Deniz, via Canva.com
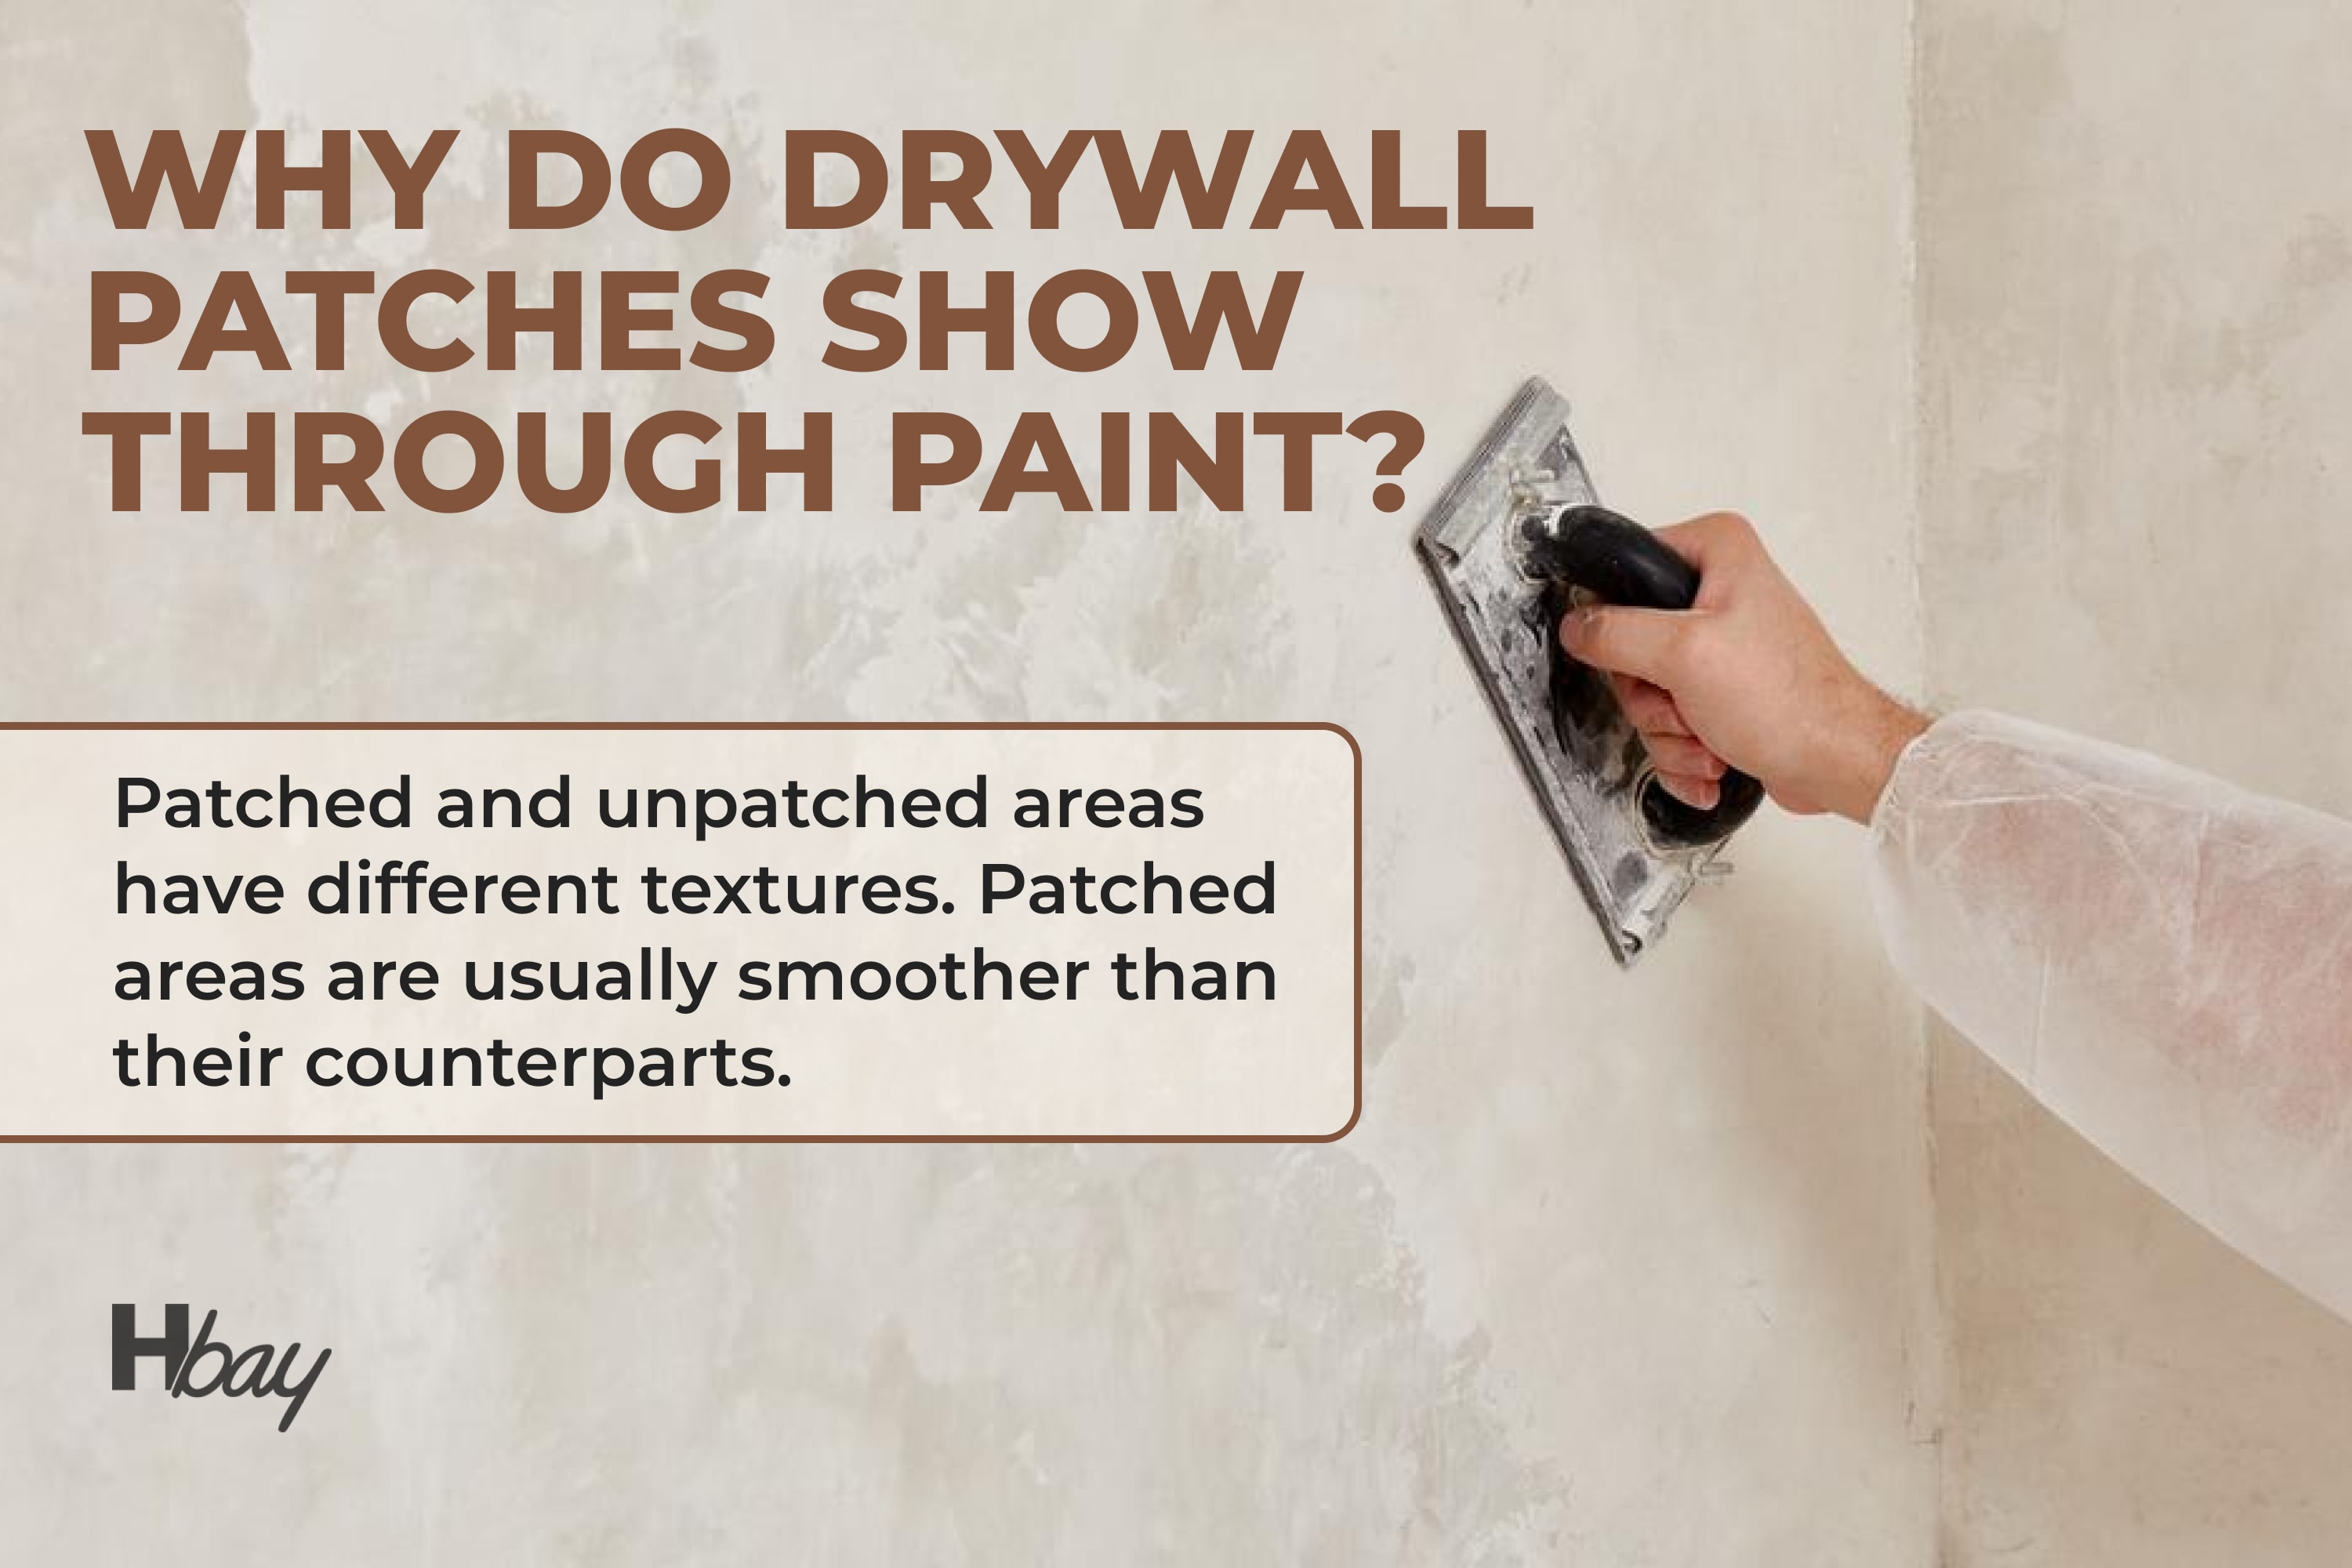
Why Are Drywall Patches Showing Through Paint?
Having a drywall patched is a troublesome thing. See, drywall is the sort of material that is very susceptible to even the minor damages, such as scratches or dents. And the bad news is that you can’t just paint over those flaws and forget about them!
housekeepingbay.com
Even when being painted, patch marks will still remain visible, especially if we look at them under the right lighting conditions. The reason why it happens is obvious and simple: the patched and unpatched areas have different textures. Patched areas are usually smoother in comparison to their counterparts.
This is why it is recommended to apply primer over those patches. Like this, you make sure that the final paint coat will be attached to the wall surface evenly and properly.
Credits: middelveld, via Canva.com
How to Fix a Bad Drywall Patch Job
If by any chance you already painted the wall that has patches on it, don’t worry. It is not a tragedy even though you have a different opinion!
housekeepingbay.com
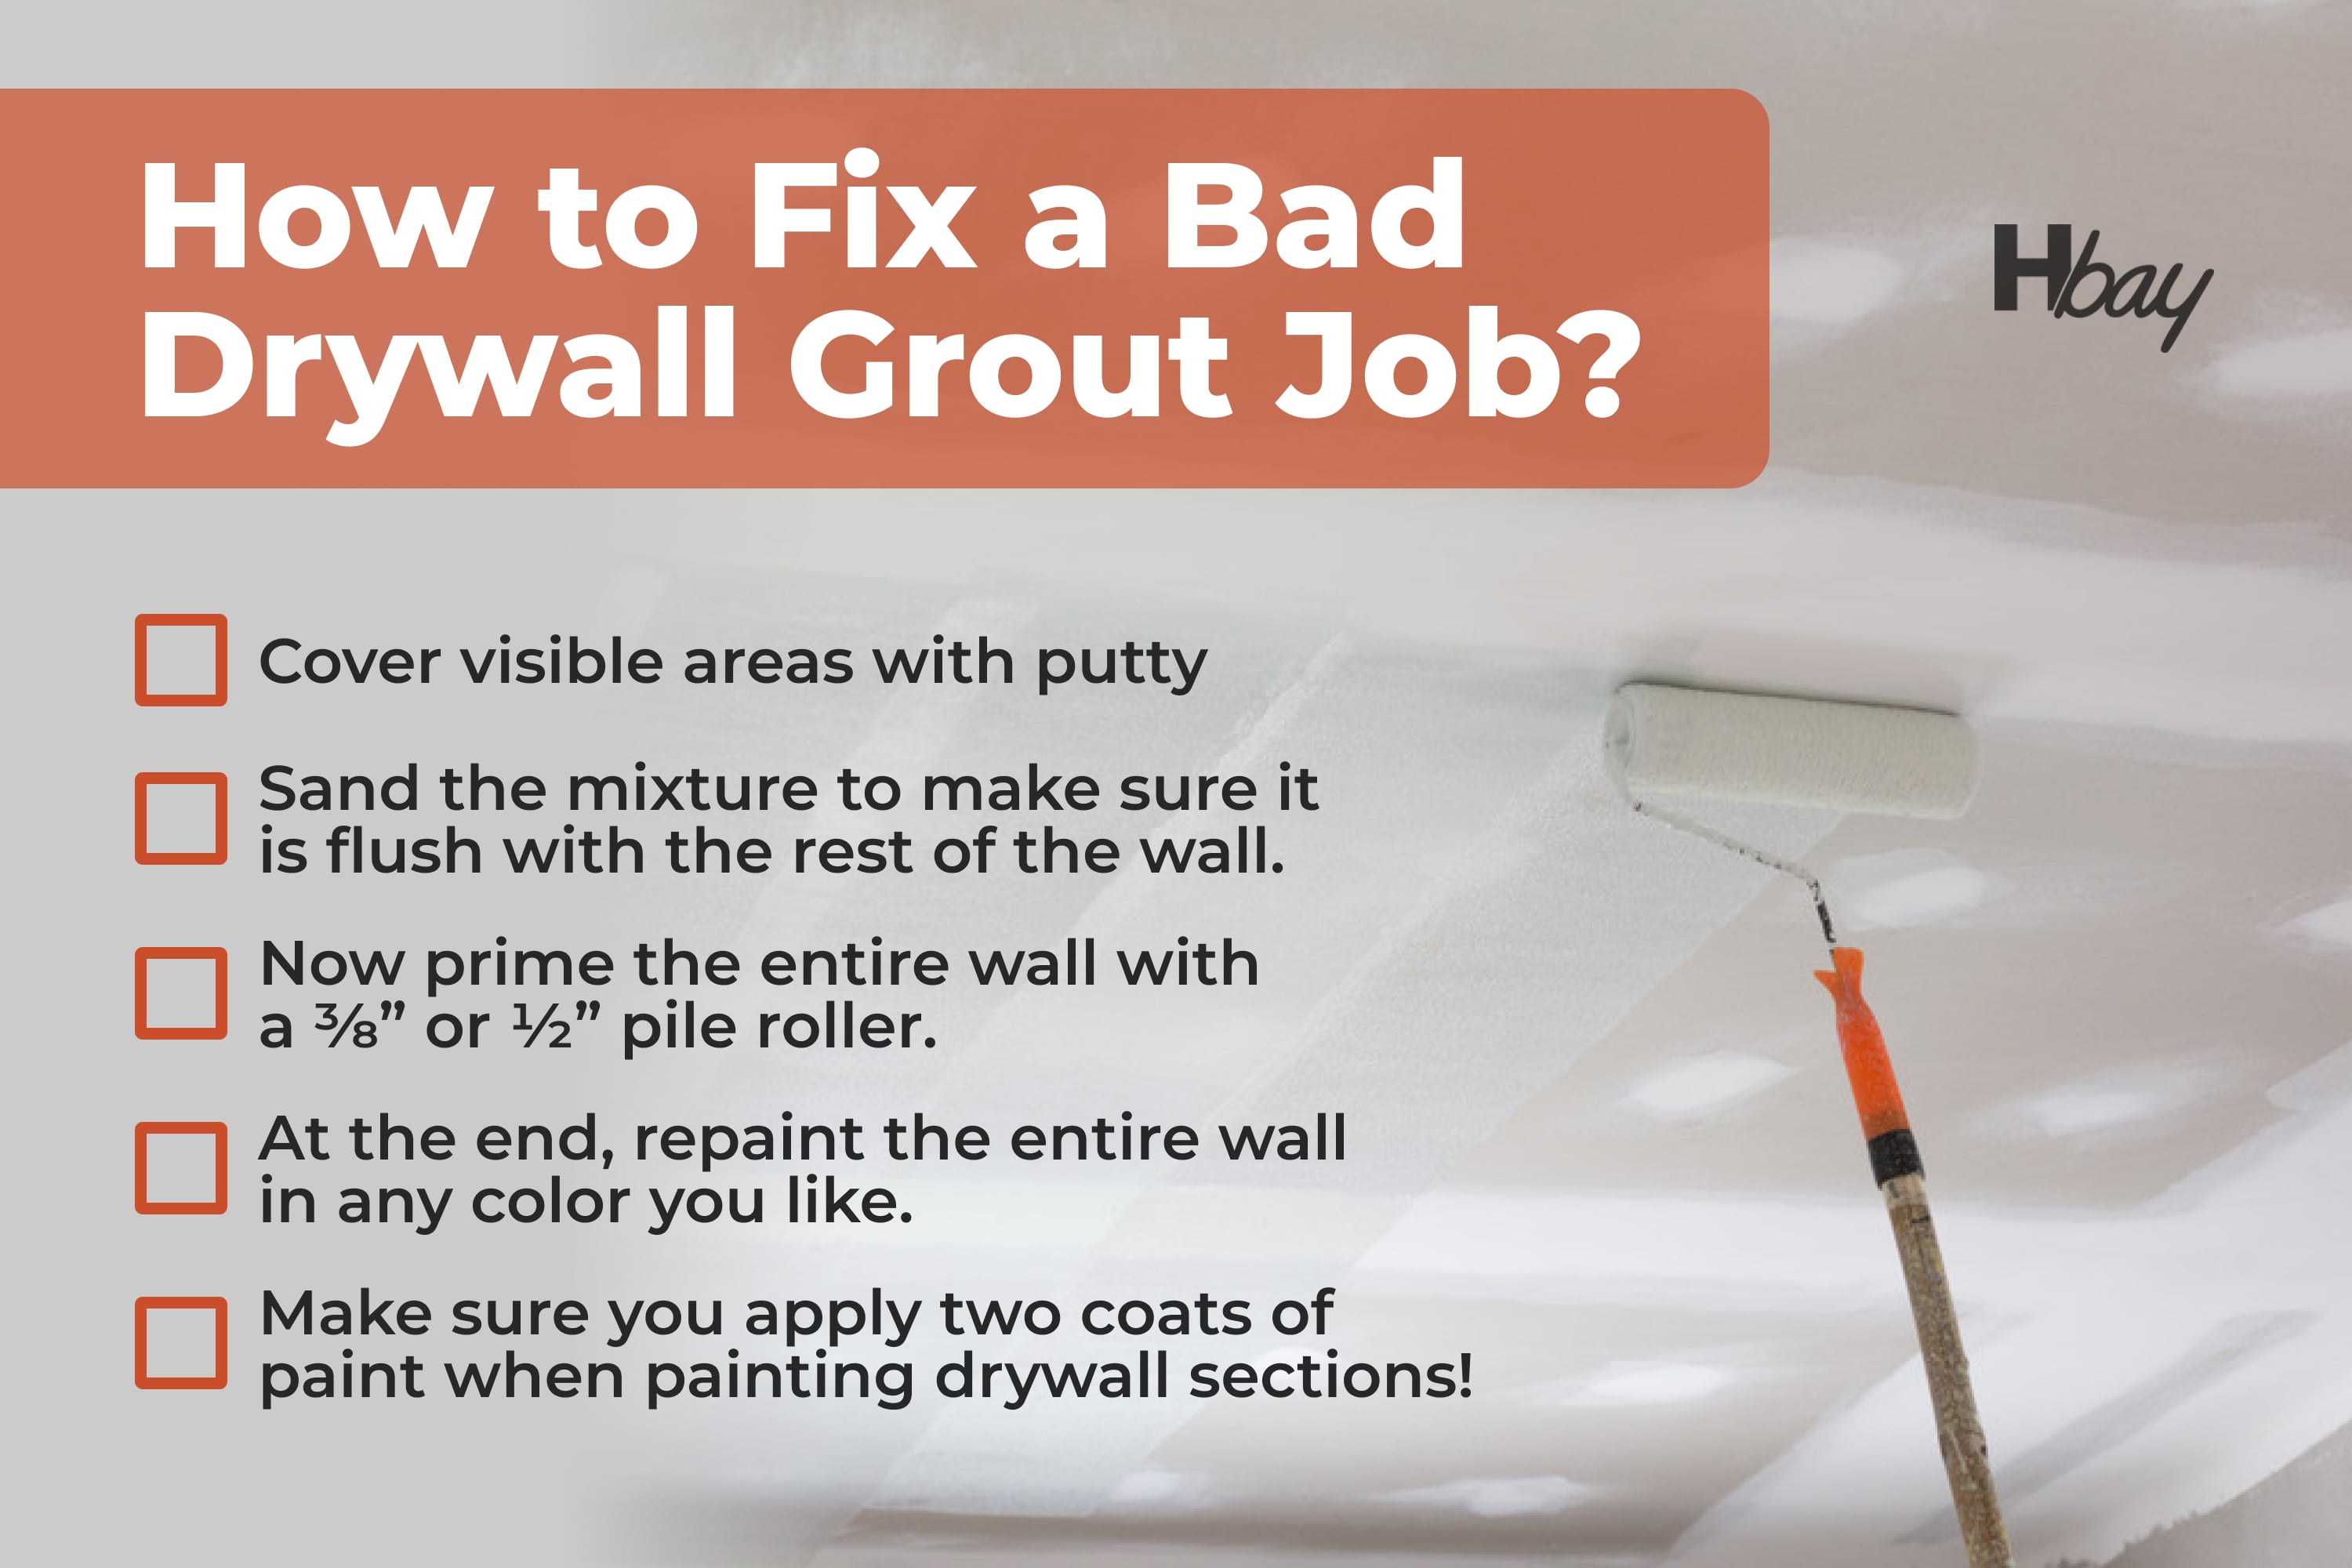
Of course, drywall patches will be easily seen through the layer of paint even if you applied several of them. However, it is still possible to fix them with a few easy steps:
- Cover the visible patches with the topping joint compound. Do it right over the paint, it’s ok.
- Sand the compound to make sure it is level with the rest of the wall.
- Now prime the entire wall with a roller that has a nap of ⅜” or ½”.
- End up with repainting the entire wall with any color you like. Make sure you apply two coats of paint when painting the drywall patch areas!
As you can see, it is not rocket science. With a bit of practice, you will be able to do such repairs like a professional pretty soon.

How to Paint Over the Drywall Patch Marks
Even if you prepared the wall correctly, you sanded it and primed, applying paint is another important step which must not be neglected. It may seem to be so simple to just grab a roller and some paint, and finish your repair project with just a few strokes.
Nevertheless, painting the drywall correctly has its nuances you have to be aware of in order not to screw up the work you did before. First of all, you should always remember about sanding the drywall!
Even before you take a paint roller, begin with sanding the patches lightly using a fine-grit sandpaper. First, smooth out all the ridges and bumps you can see or feel on the surface of the wall. Work lightly moving around the edges. The patch must blend evenly into the surrounding wall, that is your major goal now!
However, double-check that you don’t work on it too vigorously! You don’t want to etch or rub through the patching compound!
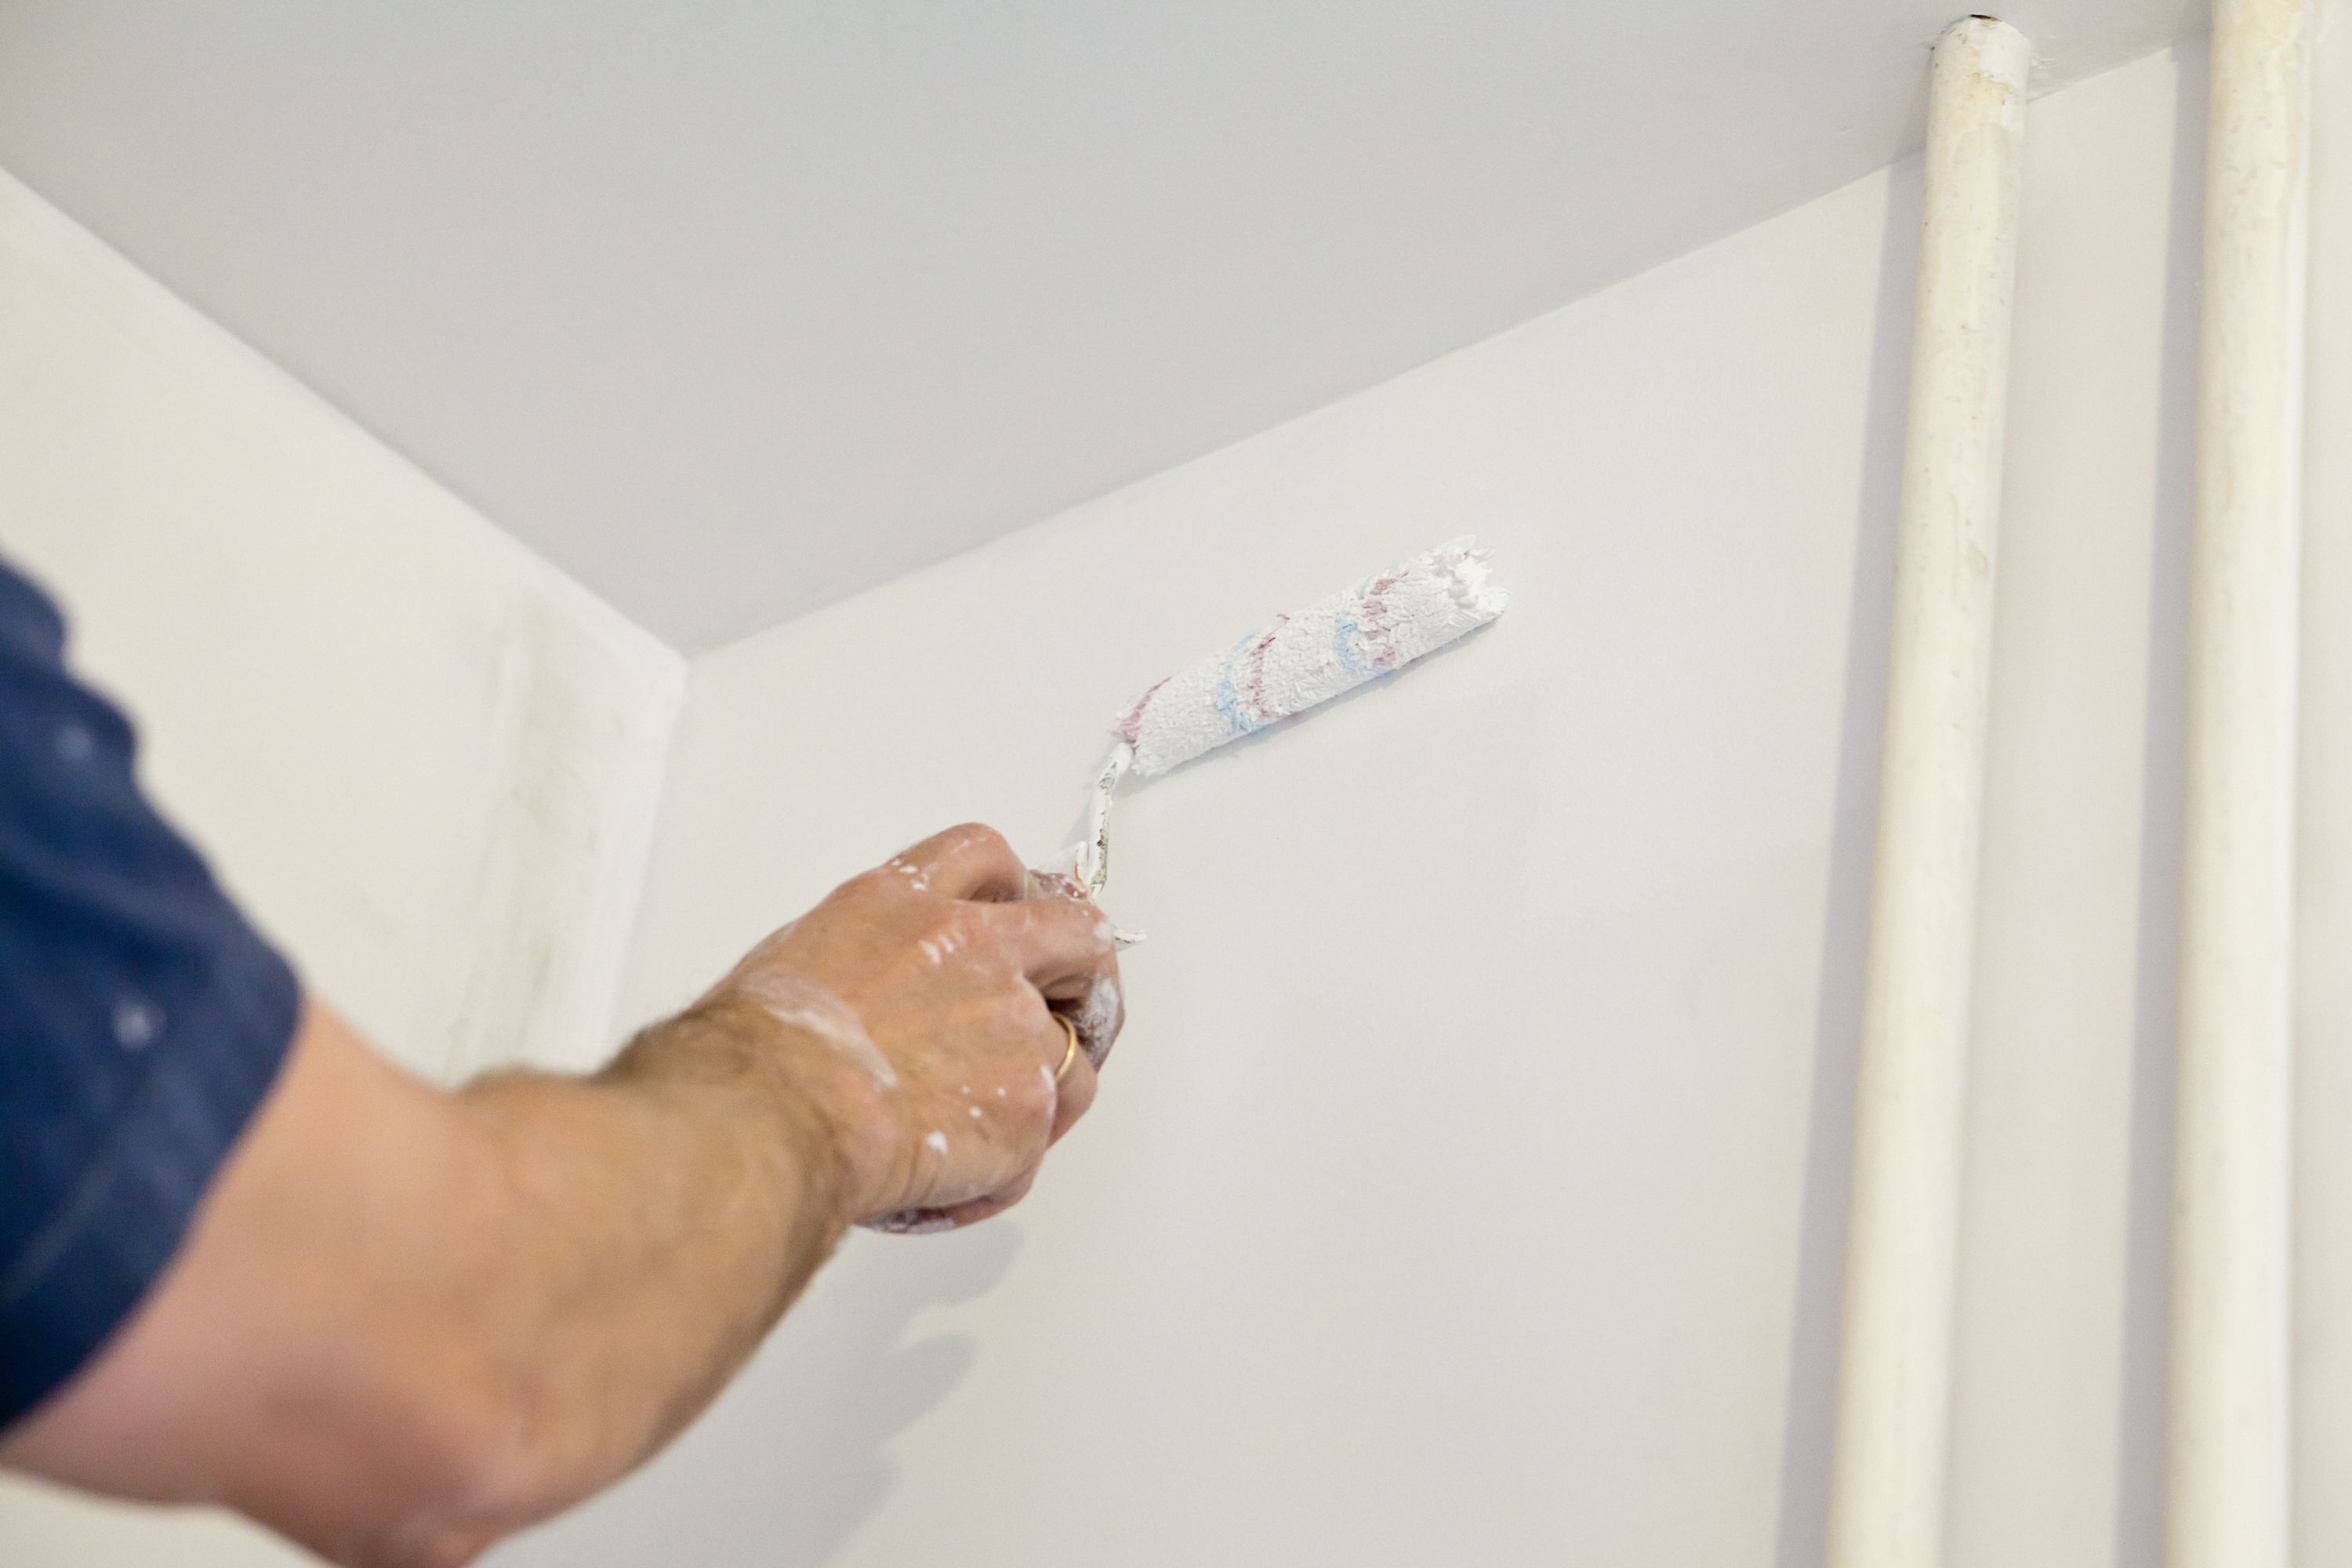
Now it is time to paint a thin layer of primer onto the areas you have just patched. Use either a foam roller or a bristle brush for this, and cover an area of at least one inch beyond the edges of the patch.
Let the primer dry for two or four hours, and then proceed to the next step which is applying paint. Start with covering the wall with a thin layer of paint blending it into the surrounding area. Let it dry for at least two hours, and then repeat the whole procedure again. If you think the wall needs the third layer as well, feel free to do it. Use latex paint and a brush or a roller.
Credits: Anita_Bonita, via Canva.com
What Tools You Will Need For Fixing the Drywall Patch Marks
To complete your repair mission successfully, remember to get all the tools and appliances ready in advance. Like this, you will not be distracted during the fixing process if you suddenly need an extra brush or a piece of sandpaper.
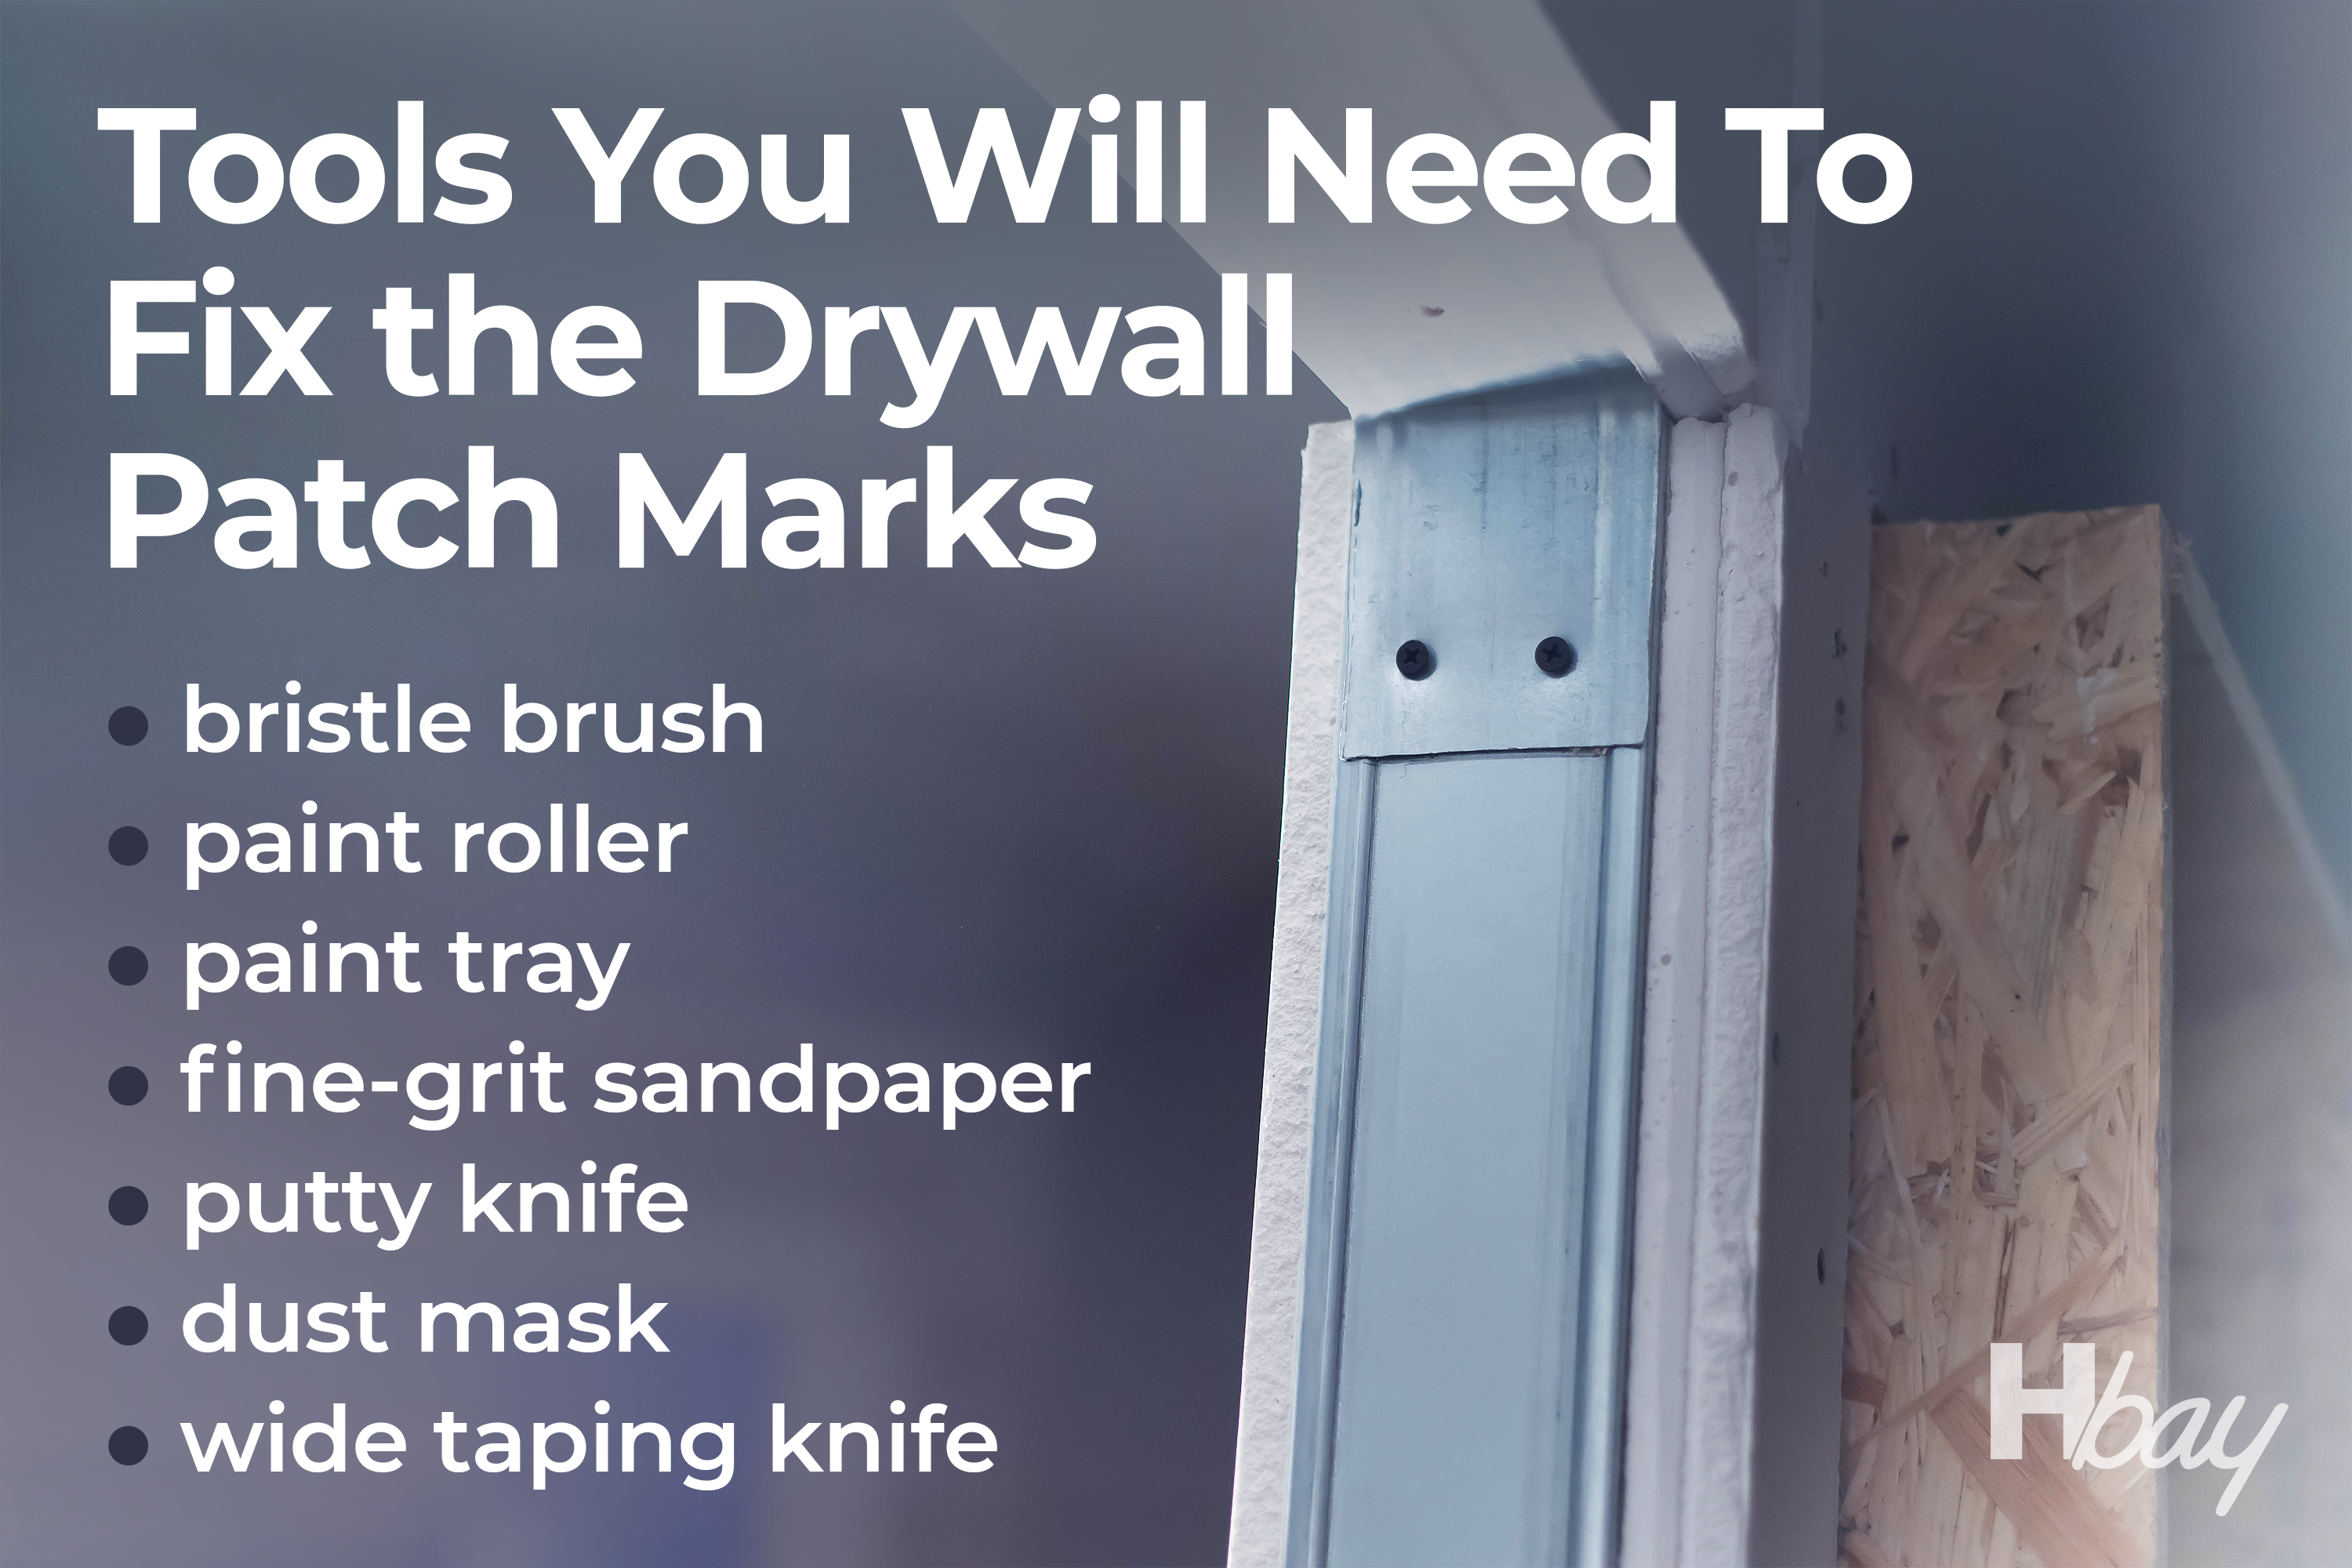
So what do you actually need? The list of tools is very simple:
- bristle brush
- paint roller
- paint tray
- fine-grit sandpaper (or better 150-grit and 220-grit)
- putty knife
- dust mask
- wide taping knife
These tools are usually more than enough for repairing the drywall patch marks. And besides, they are cheap and can be found in any hardware store.
Housekeepingbay.com
Well, this is basically the complete guide on what you shall do in case you have patch marks on your drywall, and you need to fix them quickly and relatively simply. Obviously, this is not as difficult as it seems. However, you do need to be aware of certain nuances and aspects that may influence the final result of your work!
Nevertheless, if you follow the recommendations we gave you precisely, you will surely manage to fix your drywall patches easily and do it like a professional. Especially if this is not your very first experience of such kind of work!
Ever wished paint sampling was as easy as sticking a sticker? Guess what? Now it is! Discover Samplize's unique Peel & Stick samples. Get started now and say goodbye to the old messy way!
Get paint samples


Frequently Asked Questions
⭐ How long does it take to fix the drywall patch marks?
The whole process can take you no less than one day. Two days if you need to apply several coats of paint onto the fixed wall.
⭐ Is wall joint compound toxic?
Yes, most of them contain harmful chemicals, so better look for those that are low in VOCs, biocide-free and free of formaldehyde.
⭐ What paint is best for applying on a drywall?
Use latex paint, especially satin.
17 thoughts on “How to Fix Drywall Patch Marks Showing Through Paint?”
Leave a Reply

Hello. Thanks for explaining how to fix drywall patches. Maybe you could also explain how to fix drywall flashing on the walls, please?
Why is drywall tape showing through paint? What do I do wrong?
How long does it take to fix drywall seams after painting?
I guess it depends on the area of the wall you need to work with, as well as on how visible the seams are. I’d say, to fix the medium-size area with moderately seen seams, you might need 24 hours.
I guess it depends on the area of the wall you need to work with, as well as on how visible the seams are. I’d say, to fix the medium-size area with moderately seen seams, you might need 24 hours.
Why is spackle showing through paint? I made it correctly and I prepared the wall according to the instruction. Why are those patched areas still seen?
I used to have the same issue until one of my neighbors (he’s a builder) explained that spackle is more porous than the materials of the wall. Due to the porous surface, if you don’t use a primer, the spackle spots will appear on the surface of the wall. That’s why you shoudla always use primer on the spackle spot prior to painting the wall!
Could anyone recommend me the best drywall topping compound, please? Something not too pricey but at the same time effective. Thanks!
Hey there. Well, I can only recommend you the product I used myself. It’s called Sheetrock® Brand Topping Joint Compound. I like it because it is a drywall topping compound that is easy to apply. Besides, it requires minimal mixing, so even if you’re a newbie, you can easily handle it.
Hello. Could you pelase explain why mud lines are showing through paint on the walls? What makes them remain visible?
Hello. It usually happens when there was not enough mud on the walls between the mud lines. That’s why you can see the lines now.
I patched my drywall before painting the walls, but no I can see dark patches showing through paint. Is it possible to fix that somehow?
I’m not a pro at these things, but I guess you need to redo your patched areas with drywall topping, and then paint them over again.
What can I use for filling drywall holes? We just took the nails out of it, and now I need to fix those nail holes before we prime and repaint the wall.
Well, I usually make use of either spackling compound or wall joint compound. Depends on which one of them I can find in a hardware store. But any of these will cope with those nail holes perfectly! Believe me, I did it many times!
How to fix paint flashing on the wall? I noticed that some areas of it have this noticeable flashing effect if you look at them under a certain angle. It’s almost invisible most of the time, but I know it’s there so…Do you guys have any ideas regarding how this can be fixed?
I guess the best will be to apply a coat of satin paint. You just sand the wall you have, then wipe it to remove the dust left after the sanding, and then simply paint it again. It must work as long as you have no other flaws on the wall surface.